Snowflake and Reindeer Bauble Lantern
Scrap of Your Life Christmas in July Event - Project Three
This project is a light up Snowflake and Reindeer Bauble Lantern that you can use on your table or around the house.

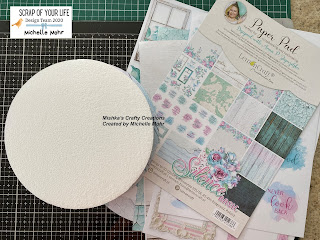
Here is a photo of the goodies I used for this project.The jar you can't see the writing on (sorry) is Texture Paste, and I also used Tim Holtz Snowflake Dies.

This project was really quick and fun, playing with distress ink, and the snowflake paste again.
I firstly cut a piece of A4 white card stock, trimming the edge off to make it big enough to fit into my bigshot. Then I scored the card stock at 1cm, and 19.5cm and flipped it over and scored again at 19.5cm. Fold the score lines.
Taking a blending brush, I started with the darkest blue (Tim Holtz distress ink chipped sapphire) at top and brushed coming in from the side and going across the top of the cardstock and down. Taking the next medium blue (Tim Holtz distress ink peacock feathers) , continued blending and lastly the light blue (Tim Holtz distress ink stormy sky) till I reached the bottom. I did blend the colours over each other a little as I started each one.
The bauble reindeer was put through the big shot, placing it in the centre fold of the cardstock.

Then I continued with the Snowflake dies on either side of the reindeer bauble. Cutting out one large and one small on each side. Add vellum to the back of the cardstock. I cut the vellum down to fit behind each scored panel to make it easier to assemble at the end.

The thing I love about texture paste is you can add any colour to it. I created a yellow paste using yellow stampin up refill ink and mixed it around till I liked the depth of the colour. I then used my spatula to put the paste through the star stencil, positioning the stars randomly around the cardstock.
I am falling in love with the snowflake paste, and a little trick I learnt for this one, was using your finger to apply it to get the fluffiness, rather than your spatula. The snowflake paste has a "crispy" feel to it, and does make a crunchy noise if you put it through a stencil. I just used my finger and placed the paste around the cardstock randomly. I used a heat gun to dry the pastes a little.

The thing I love about the snowflake die, is reusing the die piece you just cut out. No wastage here! I sprayed these pieces with Tim Holtz distress ink in brushed pewter, and heat set it, and attached them on the side of the cut snowflake using a dimensional.
To glitz the bauble a little, I added some blue pearls.
Make sure your project is completely dry before joining the two sides together with double sided tape, or you could smudge the stars and snowflake paste as you assemble.
The project is now completed!
Add a little tea light that is run on a battery (not an actual tea light candle). You can pick these up from your $2 shop or like me, from Spotlight a pack of 6.

Happy Crafting
Michelle xx


It is lovely Michelle. I am going to make some of these. xxx
ReplyDeleteThey look awesome Michelle .. want to make these too 😀
ReplyDelete