Mini Christmas Wreath
Scrap of Your Life Christmas in July Evnt - Project Two
This project is to make a Mini Christmas Wreath using a Styrofoam circle and wrapping it with burlap, and then decorating. I will pre-warn you, the preparation of this project is a little long, as there is a combination of stamping, embossing, colouring and die cutting, so ensure you make some YOU time to sit and create.

There are many different bases you could choose from if you didn't want to use Styrofoam such as wire, ready made moss or wood wreaths, francheville collection wreaths etc, it's really up to you what you want to use, and what design you are looking for at the end.
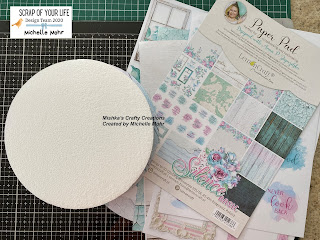
Here is a photo of the goodies I used for this project. (Distress Inks were also used)

To start the project, I rolled out the burlap long enough to cover the circle and cut the burlap down in half. I used a burlap that had a little glitter in it, although the end result doesn't show this, only the back, you could just buy plain, and you can buy burlap in a small width if you choose. I chose the large width one as I have a larger wreath I'd like to decorate at a later date.
Using a little glue and a pin, I stuck the beginning piece to the circle and pinned it there whilst I wrapped the burlap around the circle, do this for the beginning and the end. Make sure you are pulling tightly as you go along.
I then worked with my big shot to die cut out the leaves. I double layered the cardstock through the bigshot to cut two leaves at a time. I shaped the leaves a little to create a realistic look, then I started gluing them on the burlap, overlapping them slightly and rotating them left and right as you work around the circle.


Once this was completed, I let this part dry. I then worked on the Poinsettia. These were done by stamping on vellum, using versamark ink and then embossing powders over the top, set using a heat gun. I then used the matching die and cut them out through the bigshot. They were coloured using distress inks. Using 3 heartfelt creations stamens in red for the middle of each Poinsettia.

Once this was done, I used the bigshot to die cut the baubles. The bauble was placed in my spray box, with a peg to the top, and sprayed with Nuvo sprays, using the wild olive for the top, and a combination of the silver smoke and antique gold for the baubles. I let the spray drip down on each other as it was hanging to create a multicolored effect. I then used my heat gun to dry it, and let it sit a little.


And here is the end result.


I really hope you have fun creating this as much as I did. I would love to see how you create your wreath and what you used.
Happy Crafting
Michelle xx


Comments
Post a Comment