Posts

Showing posts from October, 2020

Halloween Tags and Cards
Image
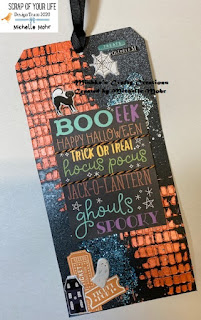
Halloween! Spooky and scary.........unfortunately not something I am greatly into, although I have to say I did enjoy making these tags and cards using the awesome Simple Stories Say Cheese Halloween 12x12 paper and the the cute Hey Pumpkin Stickers. I created the tags first using Dylusions ready made tags in Black and chose a background for one from the Simple Stories sheet and the other I used a square stencil and used my orange blush nuvo mousse and created a raised bakcground at the top and bottom of the tag. They are so easy and simple to make, just using the papers, adding dimensional under the Boo Eek wording, tying some black and orange twine, adding glitter with glue and a little bit of Dylusions white spray set it off, then I added some of the stickers. The second tag, I used the same colour nuvo mousse with a splatter stencil and added that at the top and a little at the bottom, some Halloween washi tape and the skeleton acetate.   For the cards, I used some colourf...

Yoga/Meditation Frame

Image
Mediation, Yoga and Pilates, some of my favorite exercises and relaxation go too's, so I decided to make a frame using a Stamping Bella Stamp called Curvy Girl, Namaste for my room. I chose a wooden frame and decided not to paint it, just sanded it back a little and then stuck on a piece of Vicki Boutin The little things 12x12 paper. The inside of the frame piece, I covered in white cardstock and took a piece of little things paper and embossed it with a favourite art word stencil, ensuring the word Grateful was used. I then punched the corners with a corner punch. Using my gel plate and stamps zodiac and calendar, I firstly painted the gel plate and smoothed it out with my brayer before stamping the images. For those that have used this technique before, rather than taking my frame and placing it on the Gel Plate to lift the image, I instead used the stamp itself on the frame.  Then I used my number stencil with the Nuvo mousse in blue, and for the words, I first us...

Using a Brayer to colour on Embossing Folders

Image
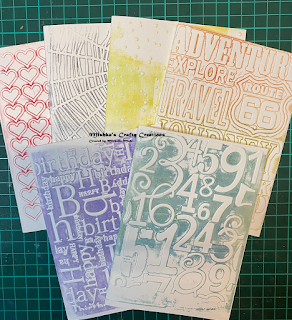
Have you ever tried using colour on your embossing folders?  I have tried many techniques, and there is no right or wrong in which technique you use, as they all are very unique in the way they come out. My personal preference is using a brayer, so here is a quick video to show you how to use your brayer on an embossing folder. Colouring Using a Brayer on Embossing Folder Video  

Summer House Frame

Image
Summer isn't too far away, so I decided to make a cute little Summer house using Crate Paper Wonder Wood Veneer Frame and created a Summer Vibe House.  What does Summer mean to you? I remember growing up I used to wait for the IceCream truck, and run out to get an icecream....so my Summer House has a quote Ï scream, you scream we all scream for icecream?, who remembers that as a child? I painted the frame black using Dylusions Paint. Once it was dry, I used a piece of A4 white cardstock and traced around the outside and inside of the frame. The inside was done so it makes it easier to work with, rather than have the frame sitting on top of the cardstock. Using a collection of different papers, Mintay Paradise, Pink Studio Joyful Day and Pretty Little Studios Tags Dream Big collection, I fussy cut images. I stuck these on with double sided tape. The happy tag and I scream you scream was sponged around the edges with archival ink in  chrome yellow. I used a colourblast sun ...

Mini Journal

Image
This cute journal was made using Vicki Boutin The Good Things paper for the cover and Kaisercraft white, Brazzill pollen and turquoise mist cardstock for the inside, and Pink Fresh Studio papers. Firstly I cut a piece of the white cardstock and the good things paper and fold ed both in half. Both pieces of paper were then scored over the fold, and on each side of the fold. Then I sponged around the paper with Distress Ink in shabby shutters. Blending towards the centre. This piece was then stuck over the top of the white cardstock and score lines refolded. Next I prepared the inserts, cutting from the pollen and turquoise cardstock, and using a blending tool, blended 3 with Tim Holtz distress Ink spun sugar and 3 with distress ink tumbled glass.   I then started to do my fussy cutting from the Pink Fresh Studio Joyful Days 12x12 paper and the Mintay Frame book papers, I cut out 3 blue frames and 3 pink from the Shabby Chic 2 section. Once the frames were cut, I ...